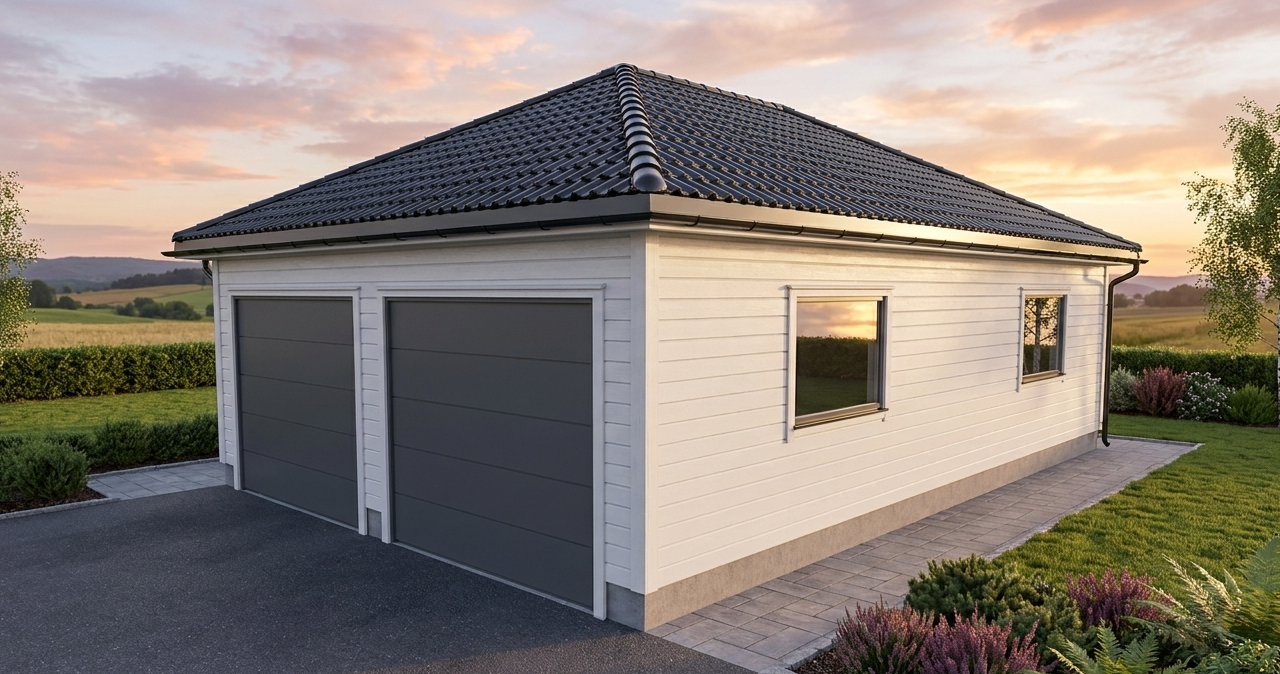
Autostrek now generates hip roofs, bringing four sloping roof faces to rectangular and square buildings. Alongside this new roof type, the Dormer tool has received a series of improvements to the places where roofs, walls and floors meet.
You will see new gutters on building extensions, eaves that line up with the main roof, and more recognizable sheathing textures. Hide the finishes and there is more to discover: missing rafters and counter battens have been added, awkward intersections have been cleaned up, and A-frame dormers have better ceiling and floor connections.
Meet Hip Roof
A hip roof slopes down on all four sides. On a rectangular building, the roof has a ridge along the longer direction. On a square building, the four faces meet at a central point to form a pyramid.
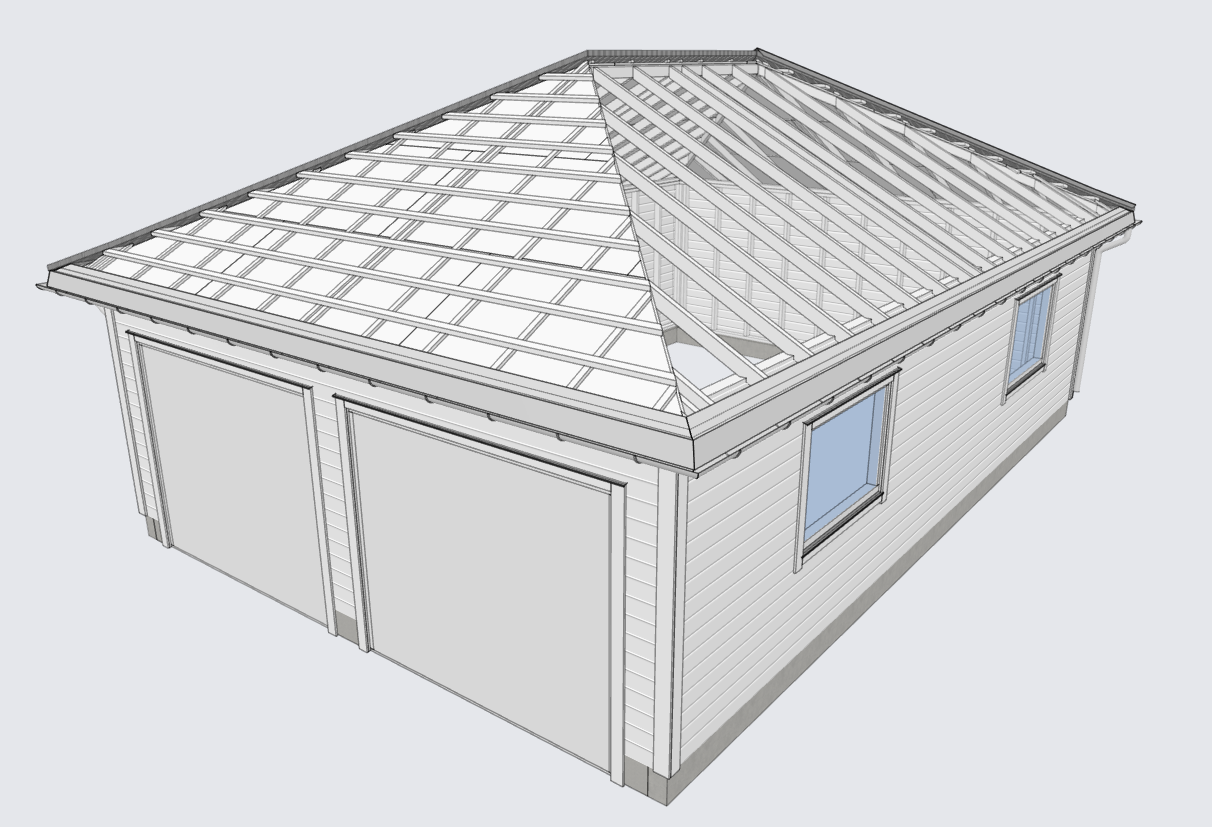
Choose Build → Roof type → Hip roof, set the pitch and overhang, and generate. Autostrek creates the main rafters, the shorter rafters approaching each corner, and the diagonal hip rafters between the roof faces. Add sheathing, counter battens, tile battens and covering to build up the roof layers.
The finished edges are part of the workflow too. Fascia, folded eaves flashing and gutters follow all four sides, with hip and ridge caps above and downpipes at opposite corners. Rafter tails are cut to fit behind the fascia.
Choose simplified covering for a lighter model, or individual flat tiles when you want to see the tile courses. Live Control lets you adjust covering thickness, surface appearance and downpipe geometry after generation.
Dormer framing that follows the roof
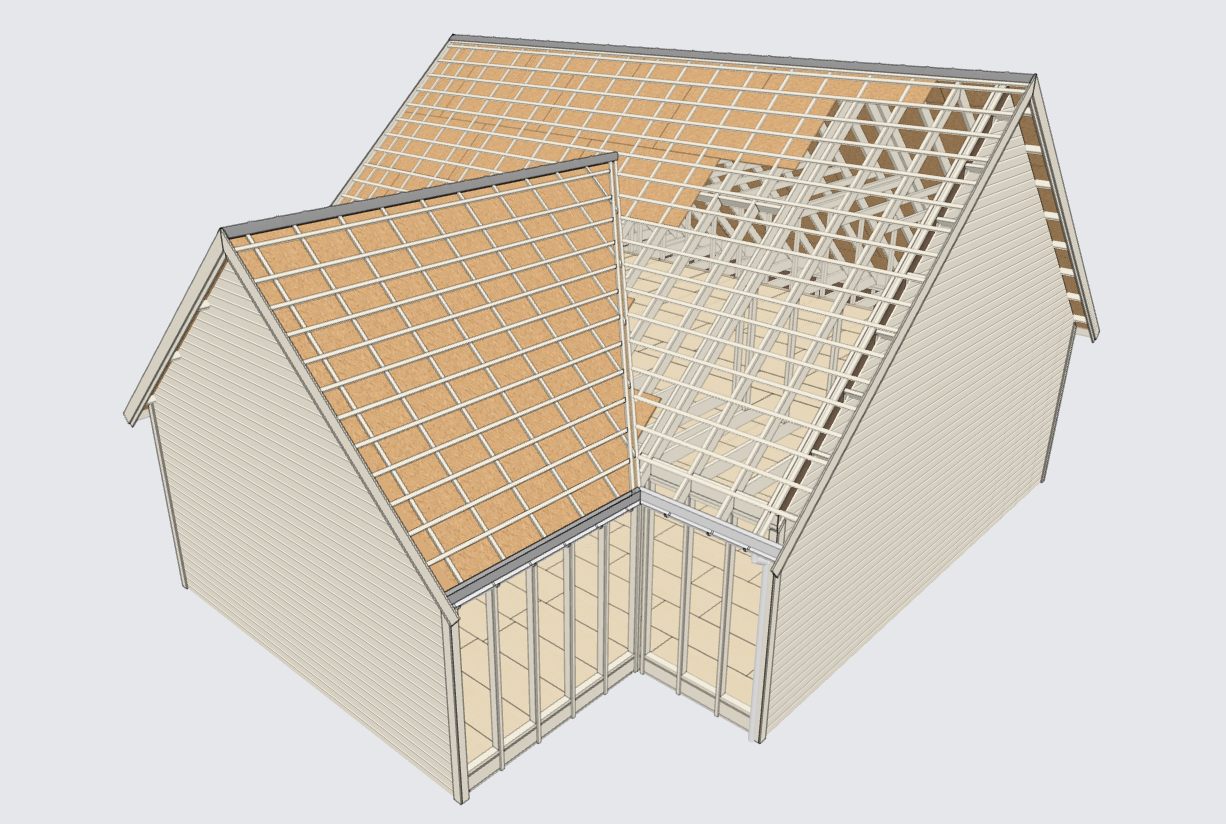
The dormer updates focus on gable dormers, including Flush Wall configurations and building extensions. Where a dormer meets the main roof, its rafters now continue up the junction and become progressively shorter as the main roof rises. They follow the building’s centre spacing, and the old extra pair at the end of the dormer has been removed.
The junction itself is cleaner. Valley supports connect the opening framing, birdsmouth cuts seat rafters on the wall plates, and rafter ends fit behind the fascia. Main-roof members that intersect extension walls receive matching seat cuts.
We have also removed floating blocking and small chord remnants left by earlier cuts, while preserving the intended structure in Closed Eave dormers. Roof sheathing and covering are trimmed where they previously poked through the interior at the eaves.
In projecting building extensions, trimmed bottom chords now have square ends and a perpendicular end cap across the opening.
The missing counter battens are back
Counter battens run up the roof beneath the horizontal tile battens. Some were missing near the rear of gable dormers, leaving gaps in the supporting layer where the roofs met.
They now follow the updated rafter layout through that transition, including the shorter rafters along the main-roof slope. The stray counter batten associated with the old final rafter pair has also been removed. Hide the covering and sheathing to see both batten layers clearly.
Extension eaves that line up
A building extension should meet the main roof with a continuous eave line. The extension’s fascia, roof layers and flashing now align at that junction, with rafter seats and wall plates working together to keep the roof at the right level.
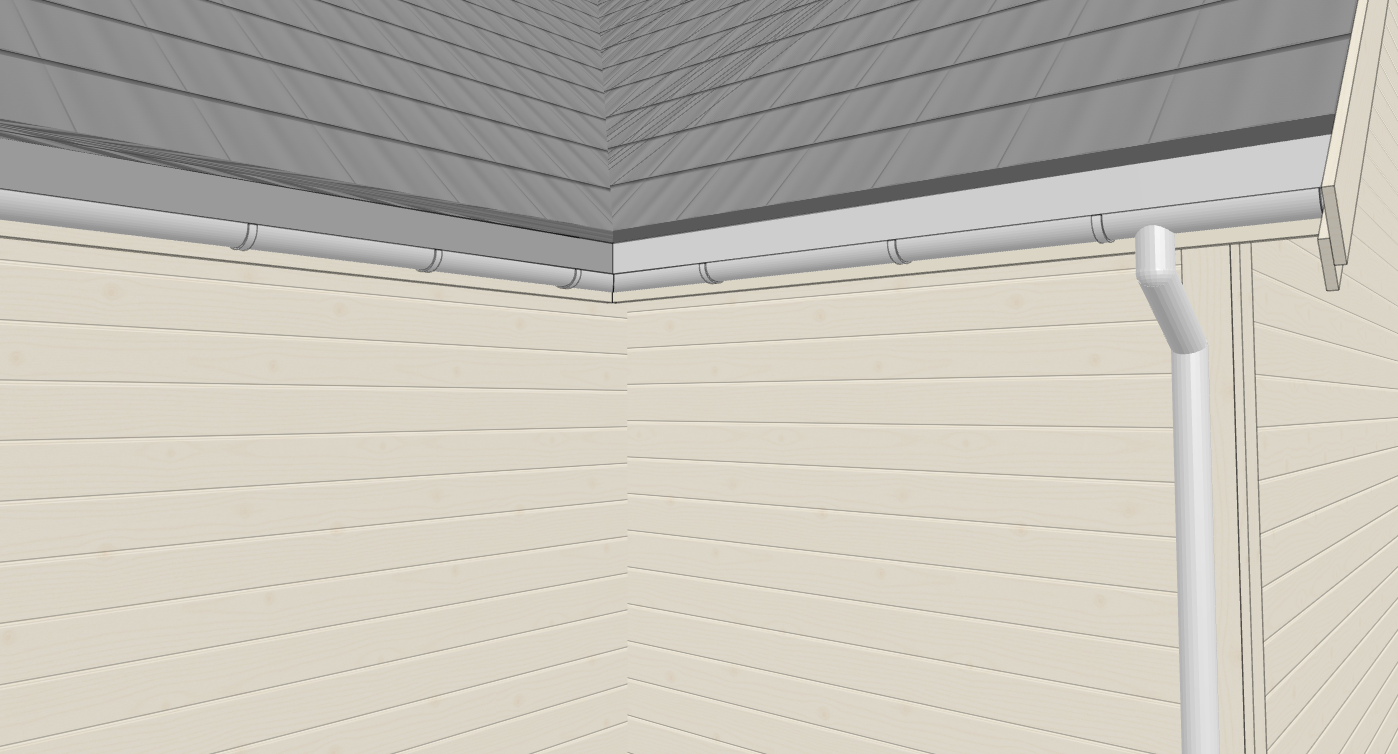
Building extensions now have gutters that connect at the main-roof junction. The flashing lip faces outward toward the gutter, and the roof edges have been refined to make the connection cleaner from both outside and inside.
A connected ceiling and a complete loft floor
Gable dormers on A-frame trusses now have collar ties at the same height as the main building’s collar ties. Where a main-roof collar tie previously ended without a connection, an extra plumb header spans the triangular opening. This makes the ceiling framing easier to follow through the dormer.
For Flush Wall gable dormers over the main A-frame bottom chords, the floor and front wall have received extra attention:
- Bottom-chord ends are squared, with blocking between them, including the edge bays.
- With Loft Floor Deck enabled, floor sheathing continues into the dormer opening.
- Sheet joints are staggered and meet on bottom chords. The panels are notched around the framing that remains at the sides.
- The floor extends beneath the front-wall bottom plate to the wall sheathing. The plate and stud bottoms rise by the floor-sheet thickness, while the top of the wall stays in place.
This loft-floor arrangement applies to Flush Wall dormers over the main building’s chords. Projecting building extensions use their separate floor arrangement.
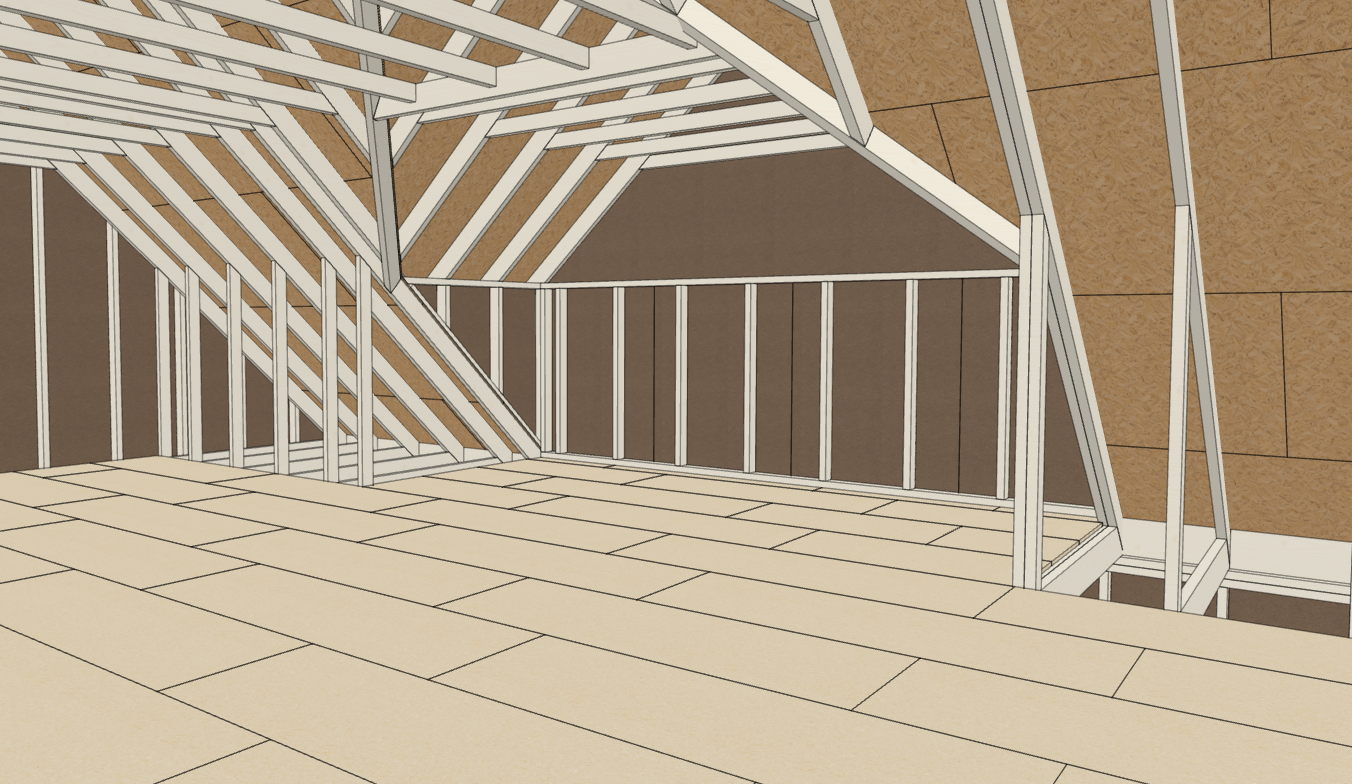
More familiar sheathing textures
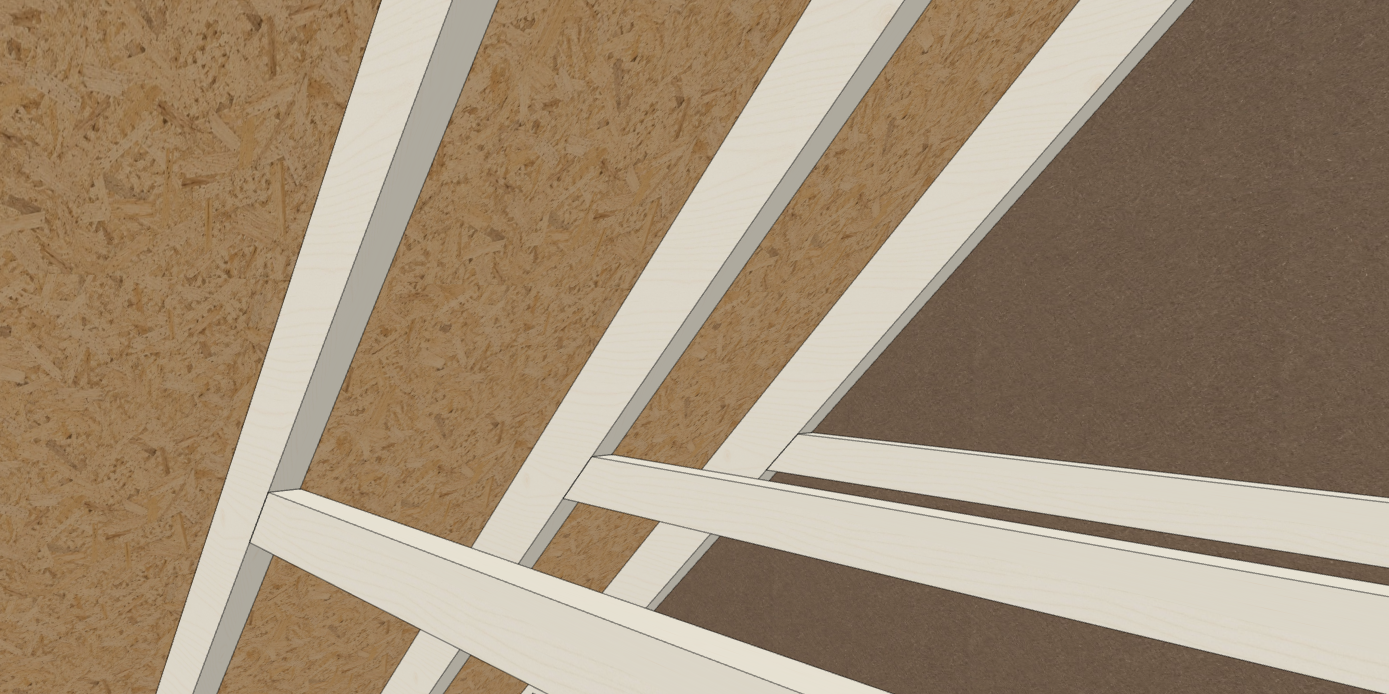
With Textures enabled in Build Generator, OSB roof sheathing now uses a clearer OSB texture. Wall sheathing uses a dark asphalt-board texture (asfaltplate), giving Norwegian users a more familiar appearance for the wall sheets.
Chipboard floors keep their light chipboard finish, so it is easier to distinguish the floor, roof and wall panels while reviewing the model. The new OSB and asfaltplate images are optimized to keep loading light, and generated texture assignments are restored when you save and reopen the project.
These are visual changes; material names and quantities still come from your model settings.
Try the updates
Save your work and refresh Autostrek to load the latest version. For Hip Roof, start with a rectangular or square building in Build. To explore the dormer changes, use a gable-roof building; dormers on hip roofs are not part of this release. Building extension remains an experimental mode.
Existing projects keep their saved geometry. To apply the dormer generation changes, start from a saved model before the opening was made, or generate a fresh building. Deleting a dormer alone does not restore the cuts already made in its host roof and walls.
For settings and step-by-step guidance, read Hip roofs, gable extensions and A-frame dormer floors, and generated sheathing textures.